
If you are an owner of a Land Rover Defender, you know that “standard” is a relative term. Over several decades of production, Land Rover made subtle but significant changes to the body tub. One of the most common pitfalls for owners upgrading to Masai 4×4 glass is the difference between the 50/50 (50mm radius) and 50/70 (70mm radius) windows.
Getting this wrong means the difference between a sleek, watertight upgrade and a frustrating afternoon with a window that simply won’t seat. Here is the deep dive into why these differences exist and how to choose.
1. The Anatomy of the Radius
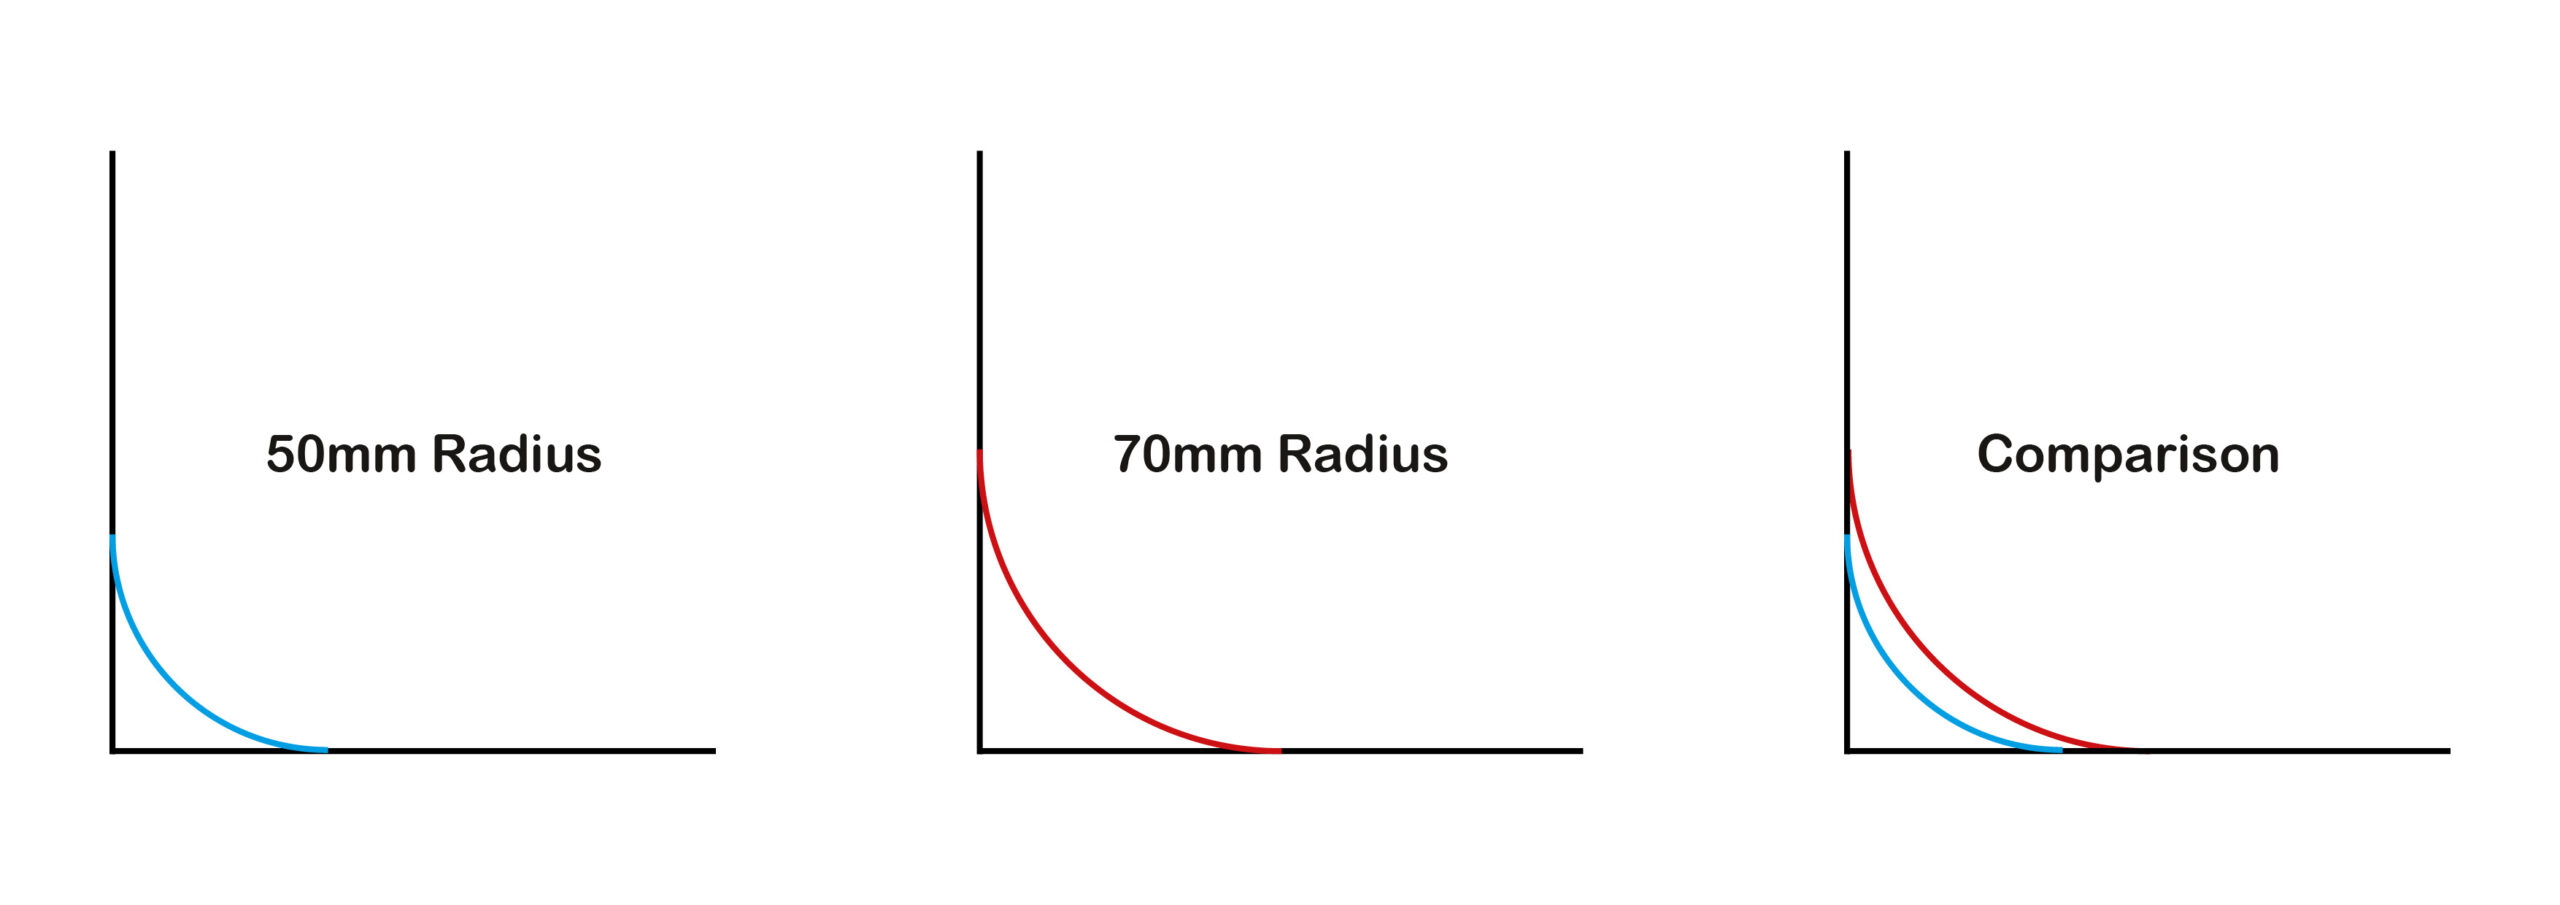
To understand the difference, we have to look at the bottom two corners of the window aperture.
-
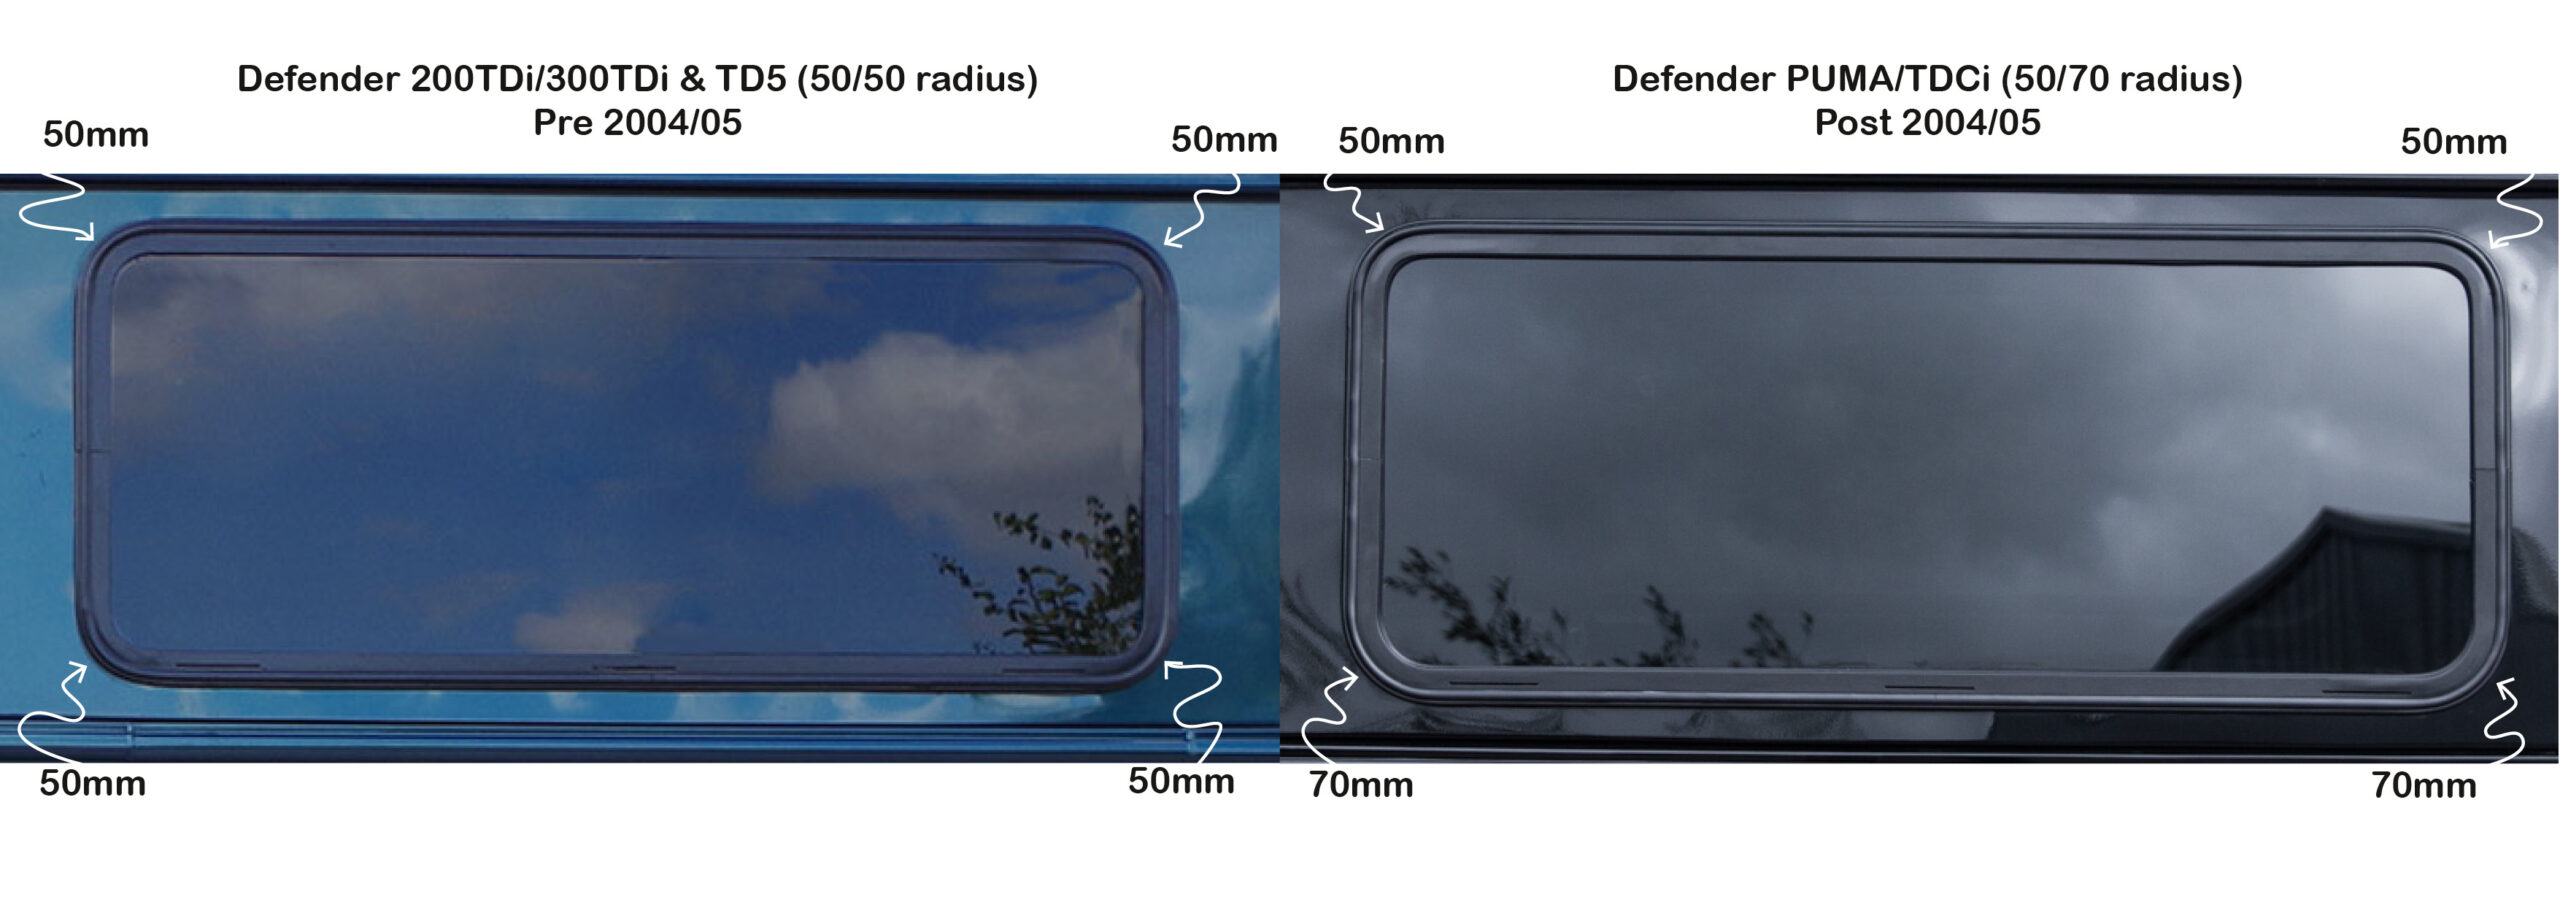
The 50/50 Standard: These windows feature a uniform 50mm radius on all four corners. This was the blueprint for the Defender for the vast majority of its life, covering the 200TDi, 300TDi, and the majority of the TD5 era.
-
The 50/70 Evolution: Around 2004/2005, Land Rover updated the side window design. While the top corners remained at a 50mm radius, the bottom corners were opened up to a 70mm radius. This change was primarily driven by the introduction of the more “car-like” internal plastic trims found in late TD5s and the subsequent Puma/TDCi models.
2. Identifying Your Vehicle’s Needs
The Factory-Fitted Rule
If your Defender left the factory with windows, your choice is dictated by the metalwork already there:
-
Pre-2004/5: You must use 50/50 windows. If you try to fit a 70mm radius window into a 50mm hole, the glass frame will hit the metal before it seats, leaving gaps in the corners.
-
Post-2004/5 & Puma: You must use 50/70 windows. These are designed to follow the wider curve of your factory aperture and sit flush against the internal Puma trim.
The Hardtop (Panel Van) Exception
If you are starting with a blank canvas—a solid metal side panel—you are the architect.
-
Choosing 50/50: Best if you are keeping a rugged, utility interior or using older-style vinyl/carpet trim.
-
Choosing 50/70: Essential if you plan on installing Puma/TDCi internal plastic trims. These trims have a wider curve at the bottom; if you put a 50mm window behind a 70mm trim, you will see the bare metal of the body tub peeking through the gaps.
3. Why Does This Matter? (The “Leaky Window” Syndrome)
The Land Rover Defender is famous for many things; being watertight isn’t usually one of them. However, most leaks in aftermarket windows aren’t caused by the glass—they are caused by improper aperture matching.
If the radius of the window frame is larger than the radius of the hole in the side panel:
-
The rubber seal cannot compress evenly.
-
Water will find the path of least resistance at the corners.
-
The frame may “foul” against the metal, leading to vibration and rattling.
4. Pro-Tips for Measuring Your Aperture
If you aren’t 100% sure of your Defender’s “birth date” (as many have been rebuilt or had panels swapped), here is a quick way to check:
-
The Paper Template: Trace the bottom corner of your current window or trim onto a piece of paper. If the curve is tight (like the diameter of a small citrus fruit), it’s likely 50mm. If it’s a much shallower, wider curve (more like a large grapefruit), it’s a 70mm.
-
Check the Trim: If you have a modern-looking plastic interior trim that feels like it belongs in a Discovery, you almost certainly need the 50/70 version.
Summary Table for Quick Reference
| Feature | 50/50 Window | 50/70 Window |
| Top Corner Radius | 50mm | 50mm |
| Bottom Corner Radius | 50mm | 70mm |
| Primary Fitment | 200TDi, 300TDi, Early TD5 | Late TD5, Puma TDCi (07-16) |
Final Thought: Whether you are restoring a classic or modernising a Puma, the right window makes the build. Measure twice, cut once, and ensure your radius matches your vision.