
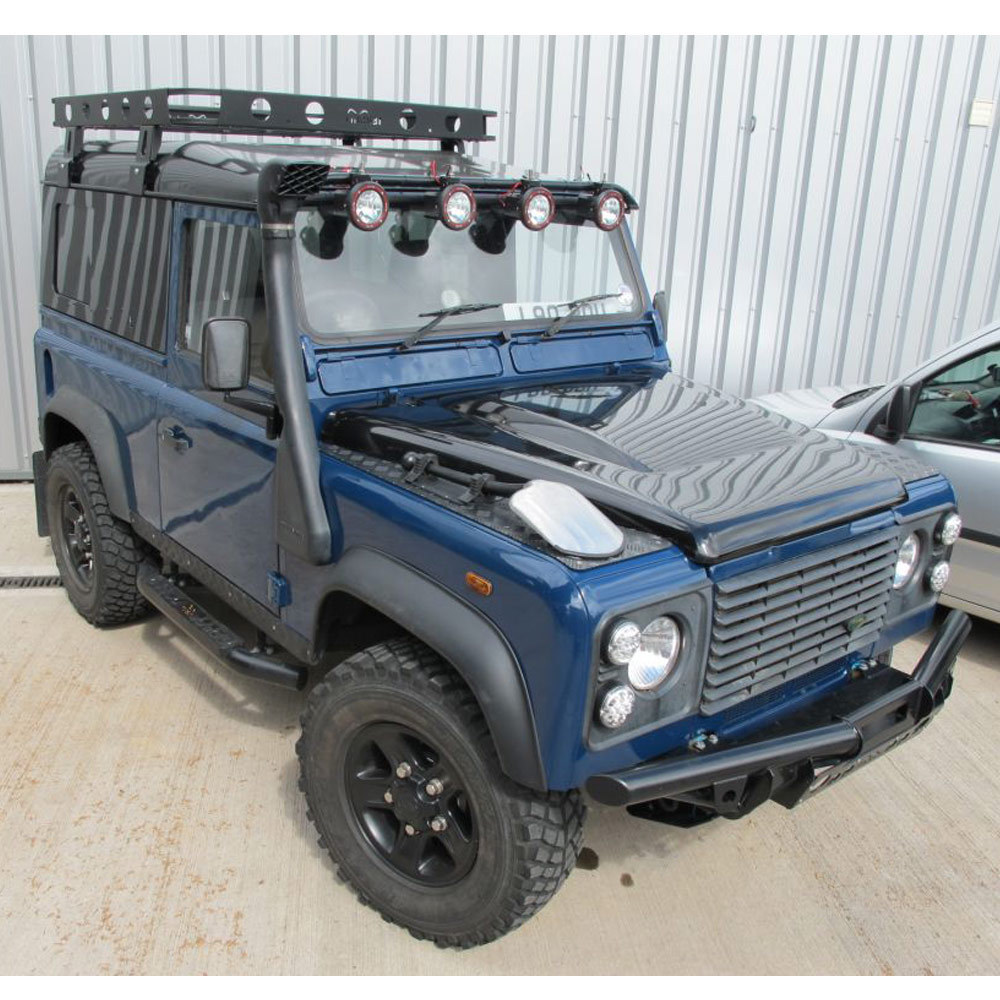
As a Land Rover Defender engineer, I’ve always been fascinated by the continuous evolution of these iconic vehicles. One particular area of interest is the bonnet design. Many Defender enthusiasts have shown a desire to upgrade their TD5 bonnets to match the sleeker and more modern Post-2007 PUMA TDCi bonnets. In this blog post, I’ll walk you through the process of upgrading your TD5 bonnet and adjusting the hook and striker to ensure proper functionality of the bonnet latch.
Step 1: Acquiring the Right Parts
Before you start the upgrade process, make sure you have the following parts and tools:
- Post-2007 PUMA TDCi bonnet
- PUMA bonnet hinge kit
- PUMA bonnet latch assembly
- PUMA bonnet Stay Kit
- PUMA bonnet Sound Deadening (optional)
- LAND ROVER Decals (optional)
- Basic hand tools (sockets, wrenches, pliers, screwdrivers)
Step 2: Removing the TD5 Bonnet
First, open the bonnet and remove the bonnet scissor support assembly. Next, remove the two bonnet hinges by unscrewing the four bolts on each hinge. Carefully lift the TD5 bonnet off the vehicle and set it aside.
Step 3: Installing the PUMA Bonnet Hinges
Now, install the new PUMA bonnet hinges using the existing mounting holes on the vehicle. Ensure they are properly aligned and securely fastened.
Step 4: Fitting the PUMA TDCi Bonnet
Carefully position the new PUMA TDCi bonnet onto the newly installed hinges. Align the bonnet with the fender lines and check for proper clearance with the front grille and headlights. Once aligned, secure the bonnet to the hinges using the provided bolts. This may need the assistance of another person to do this successfully.
Step 5: Installing the PUMA Bonnet Latch Assembly
Remove the existing TD5 bonnet latch assembly by unscrewing the bolts holding it in place. Install the new PUMA bonnet latch assembly in the same location, using the existing mounting holes. Make sure it’s securely fastened and properly aligned with the catch on the bonnet.
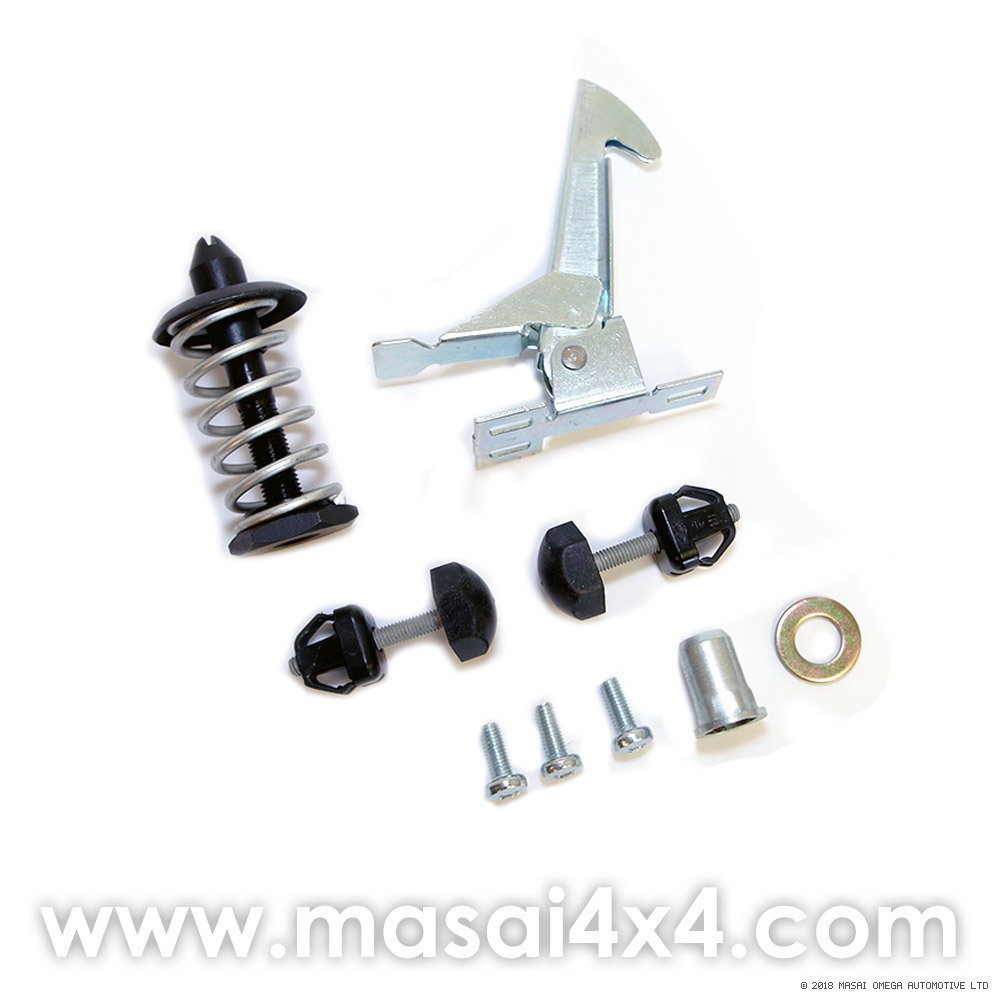
Step 6: Adjusting the Hook and Striker
To ensure the bonnet latch functions correctly, you’ll need to adjust the hook and striker. Start by closing the bonnet gently, making sure it latches in place. If it doesn’t latch, you may need to adjust the striker plate by loosening its mounting bolts and moving it up, down, or side to side until it aligns with the hook.
Once aligned, tighten the striker plate bolts and test the latch again. If necessary, make further adjustments until the bonnet latches securely and the gap between the bonnet and the body is even.
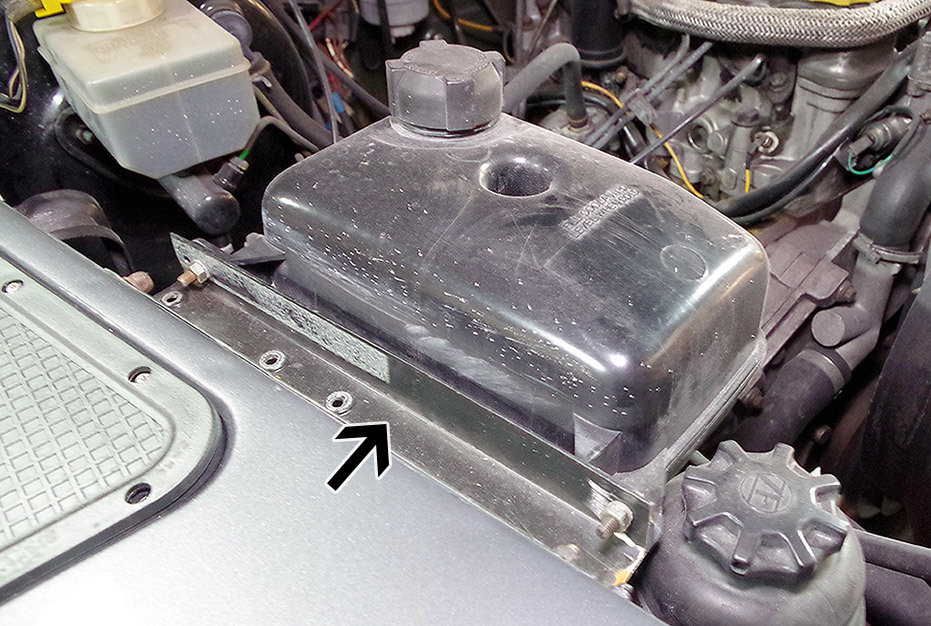
For 200TDI owners, an additional adjustment is needed to move the coolant tank away from the side of the wings so that it does not impede the movement of the bonnet. We recommend that you use a U-Shaped bracket shown in the photo above to space out the coolant tank so the bonnet can correctly shut.
Step 7: Installing Optional PUMA Bonnet Components
If you’ve opted to install the PUMA stay kit and insulation, now is the time to do so. Attach the PUMA stay kit to the designated mounting points on the bonnet and vehicle body. Next, install the PUMA bonnet insulation by attaching it to the inner side of the bonnet using the provided clips or adhesive.
Job Done!
Upgrading your TD5 bonnet to a Post-2007 PUMA TDCi bonnet is an excellent way to modernize the appearance of your Land Rover Defender. With the right parts and tools, the process is relatively straightforward. Remember to take your time and make precise adjustments to ensure proper fitment and functionality of the bonnet latch.